If you’re searching for the Best Trekking Poles Under $100, you’re in the right place. Trekking poles aren’t just accessories—they’re true performance tools. Whether you’re climbing rocky switchbacks, descending steep alpine trails, or navigating slippery river crossings, the right pair can dramatically reduce joint strain, improve stability, and extend your endurance on the trail.
And here’s the best part: you don’t need to spend $150–$200 to get a reliable, trail-ready pair. Today’s sub-$100 trekking poles are surprisingly tough, lightweight, and packed with features once reserved for premium models.
In this expanded guide, we’ll break down:
- Why trekking poles are essential for serious hikers
- The exact features to prioritize (and which ones to ignore)
- Detailed breakdowns of the top-performing budget models
- Expert tips to help you choose confidently
Let’s hit the trail.
Why Trekking Poles Matter for Serious Hikers
Many hikers underestimate trekking poles—until they actually use them. The first time you descend a steep trail without knee pain or cross a rocky stream without slipping, you’ll understand why experienced backpackers never leave home without them.
Below, each benefit deserves its own spotlight.
Reduce Knee Strain by Up to 25%
Downhill hiking is brutal on your knees. Every step multiplies impact forces, especially if you’re carrying a heavy pack. Trekking poles redistribute that force by engaging your upper body. Instead of your knees absorbing all the shock, your arms and shoulders share the load. On long-distance routes like the Appalachian Trail, this reduction in stress can mean the difference between finishing strong and developing chronic pain. If you’ve ever felt that “burn” in your knees after a steep descent, trekking poles are your insurance policy.
Improve Balance on Uneven Terrain
Loose gravel, mud, snow patches, and exposed roots all increase your risk of slipping.
Trekking poles create two extra contact points with the ground. That turns your body into a stable four-point system instead of just two legs.
On rugged terrain like Yosemite National Park, that added stability is invaluable.
They’re especially helpful for:
- Narrow ridgelines
- Stream crossings
- Snow-covered trails
- Rocky switchbacks
Help Maintain Rhythm and Pace
Using trekking poles promotes a natural walking rhythm—plant opposite pole to stepping foot.
This rhythm:
- Improves efficiency
- Encourages consistent breathing
- Helps maintain steady pace over long distances
Over time, this reduces overall fatigue.
Increase Stability with Heavy Backpacks
Carrying 30–50 pounds changes your center of gravity.
Trekking poles counterbalance that load, especially during:
- Sharp descents
- Technical terrain
- Sidehill traverses
Backpackers on multi-day trips quickly realize poles aren’t optional—they’re essential.
Assist During River Crossings
Water crossings are risky. Wet rocks are slippery, and current pressure can knock you off balance.
Poles allow you to:
- Test depth before stepping
- Brace against current
- Stabilize while moving
That extra security builds confidence and prevents accidents.
What to Look for in Trekking Poles Under $100
Not all budget trekking poles perform equally. Here’s what separates smart buys from regrets.
1. Material: Aluminum vs Carbon Fiber
Aluminum: The Durable Workhorse
- Strong and impact-resistant
- Bends instead of snapping
- Slightly heavier
- Excellent for rocky terrain
Aluminum is ideal for hikers who prioritize durability and rugged use.
Carbon Fiber: The Lightweight Performer
- Significantly lighter
- Absorbs vibration well
- Reduces arm fatigue
- Can crack under extreme stress
For long-distance hiking like the Pacific Crest Trail, lightweight carbon fiber often wins.
Under $100, aluminum usually offers better durability per dollar.
2. Weight & Portability
The sweet spot for most hikers is 16–20 ounces per pair.
Lighter poles:
- Reduce arm fatigue
- Improve swing efficiency
- Feel more natural over long miles
Also check collapsed length—under 25 inches is ideal for backpack storage.
3. Locking Mechanism
Flick Locks (Lever Locks)
- Easy to adjust
- Reliable in cold weather
- Less prone to slipping
Twist Locks
- Lightweight
- Sleeker design
- May loosen over time
For serious hiking, lever locks are generally more dependable.
4. Grip Comfort
Your hands will grip these for hours. Comfort matters.
Cork
- Best moisture control
- Molds to your hand shape
- Premium feel
EVA Foam
- Lightweight
- Comfortable
- Absorbs sweat
Rubber
- Durable
- Less breathable
Cork grips are usually preferred for long hikes.
5. Adjustable Length
Most trekking poles adjust between 24″–54″.
Correct sizing rule:
Your elbow should form a 90-degree angle on flat ground.
You’ll also adjust length:
- Shorter for uphill
- Longer for downhill
Proper adjustment improves posture and reduces strain.
Best Trekking Poles Under $100 – Top Budget Picks
Now let’s break down each top model in more detail.
1. Cascade Mountain Tech Carbon Fiber Trekking Poles
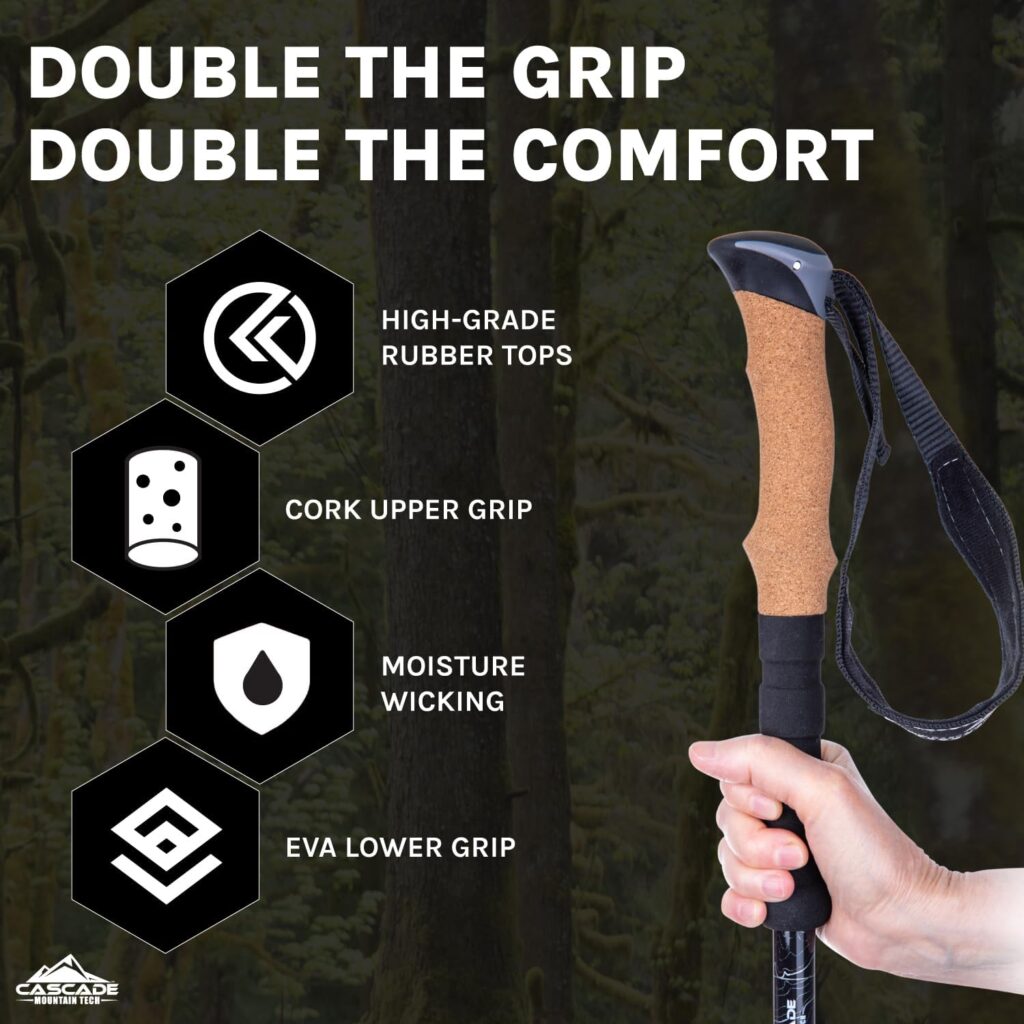
Price Range: $29
Material: Carbon Fiber
Weight: ~16 oz
These are among the most popular budget carbon poles on the market.
Why They Stand Out
- Ultra-lightweight design
- Comfortable cork grips
- Reliable quick-lock system
- Excellent vibration absorption
Who Should Buy Them?
- Long-distance hikers
- Weekend backpackers
- Hikers focused on minimizing pack weight
Potential Drawback
Carbon fiber isn’t as impact-resistant as aluminum in extreme rocky terrain.
2. TrailBuddy Trekking Poles
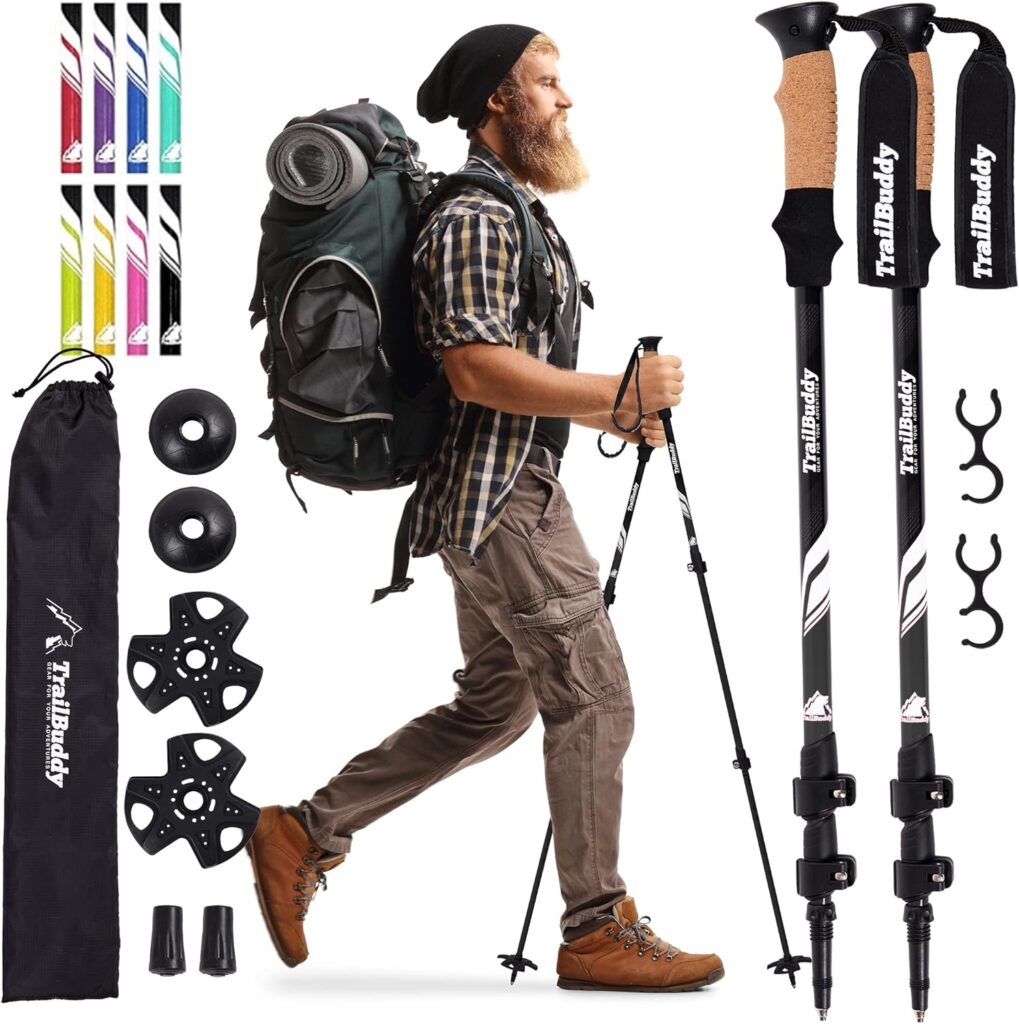
Price Range: $39–$49
Material: 7075 Aluminum
Weight: ~19 oz
These are incredibly strong for the price.
Key Strengths
- Aircraft-grade aluminum
- Durable lever locks
- Cork handles
- Budget-friendly pricing
Best For
- Beginner hikers
- Rocky terrain
- Budget-conscious buyers
Slightly heavier—but extremely dependable.
3. Black Diamond Trail Back Trekking Poles
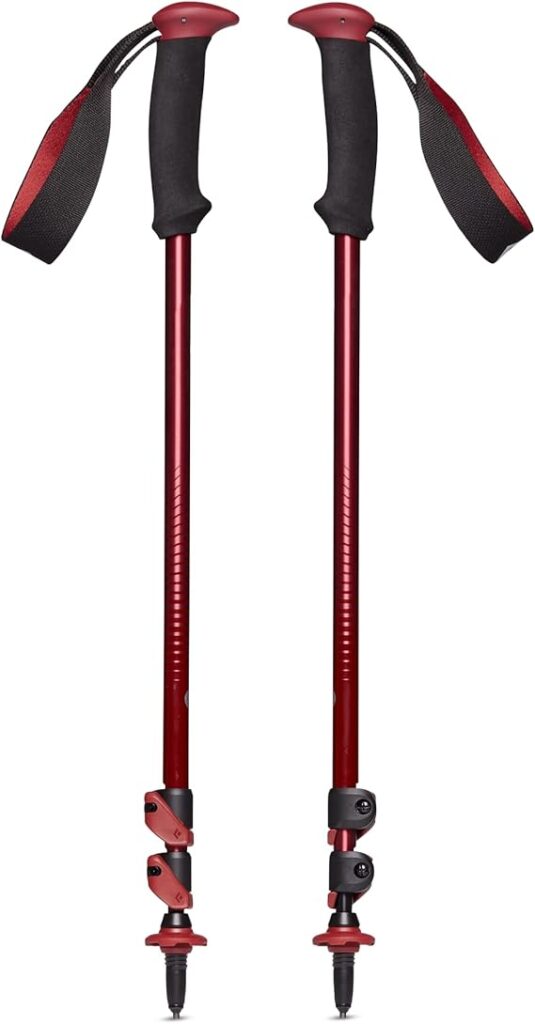
From Black Diamond Equipment
Price Range: $69
Material: Aluminum
Why They’re Premium Under $100
- Proven FlickLock system
- Excellent durability
- Trusted outdoor brand reputation
Best For
- Serious hikers
- Multi-day backpackers
- Rugged mountain terrain
Foam grips instead of cork, but performance remains excellent.
4. Montem Ultra Strong Trekking Poles
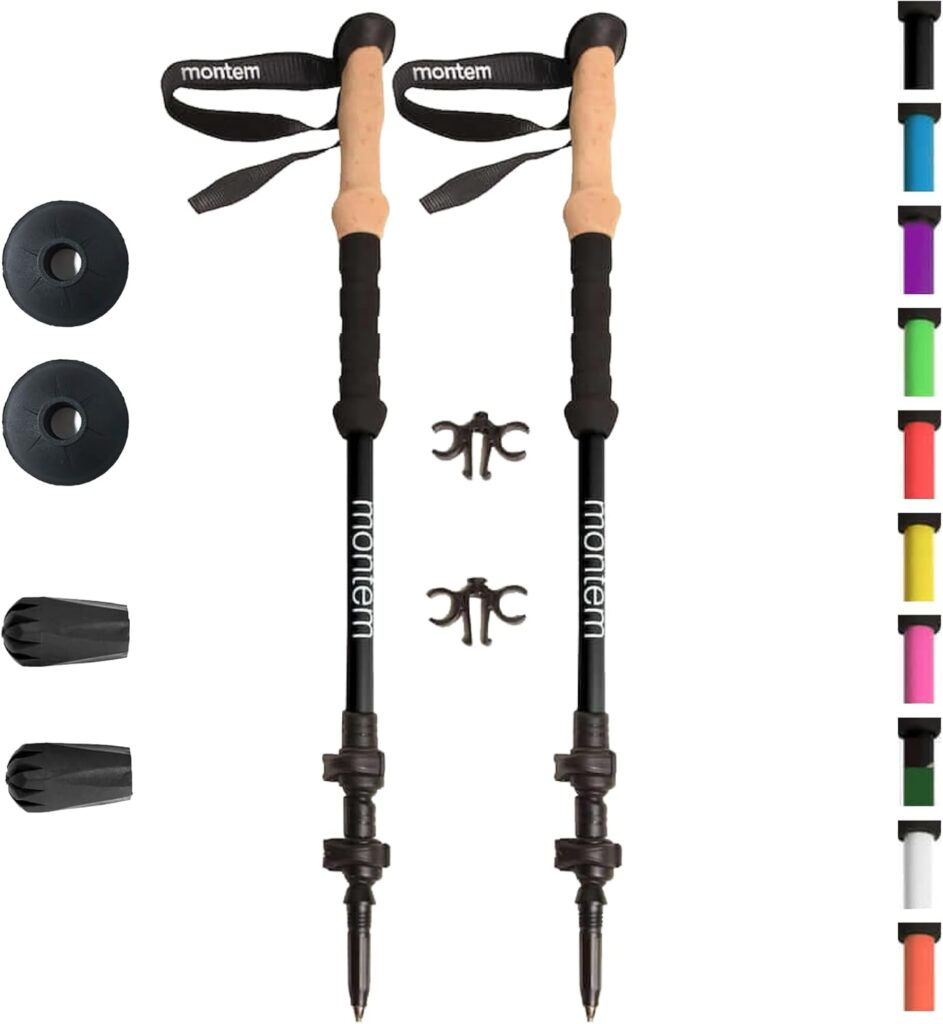
Price Range: $64
Material: Aluminum
Top Features
- Tungsten carbide tips
- Comfortable EVA grips
- Lifetime replacement promise
Best For
- Heavy packs
- Tough terrain
- Long-term durability seekers
Slightly bulkier—but built to last.
5. Foxelli Carbon Fiber Trekking Poles
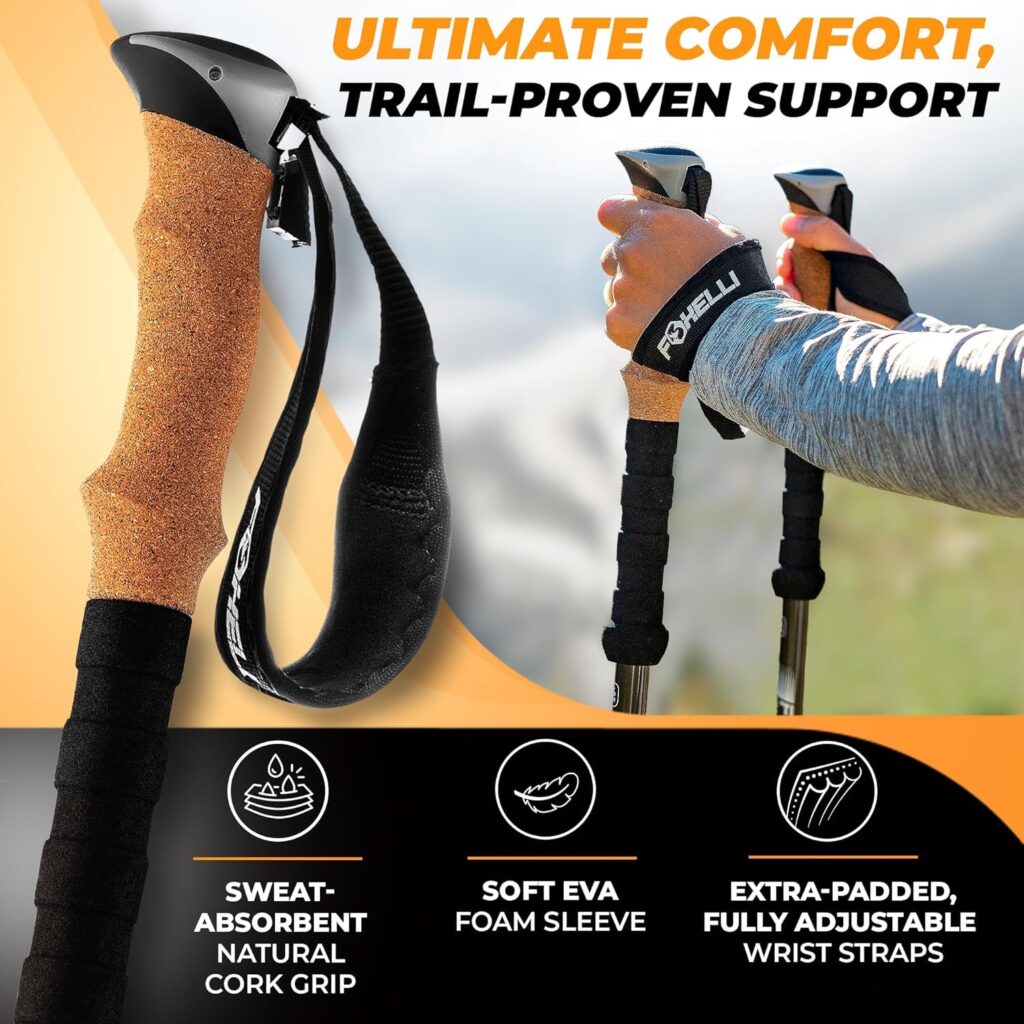
Price Range: $60–$80
Material: Carbon Fiber
Why Hikers Love Them
- Lightweight build
- Moisture-wicking straps
- Secure quick-lock mechanism
Ideal For
- Endurance hiking
- Moderate terrain
- Long mileage days
6. Hiker Hunger Carbon Fiber Trekking Poles
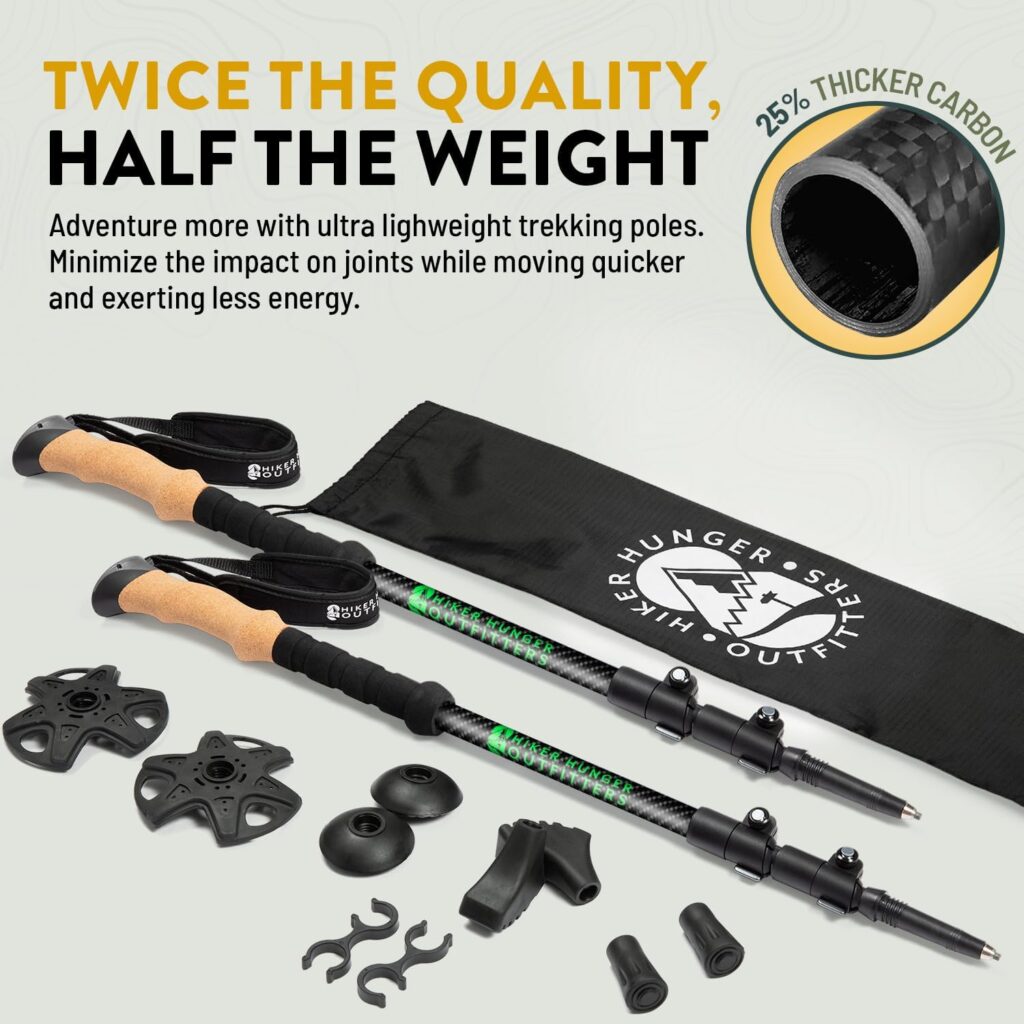
Price Range: $59
Material: Carbon Fiber
Key Highlights
- Cork grips
- Strong metal flip locks
- Stylish, modern design
Best for ultralight-focused hikers.
7. TheFitLife Nordic Walking Trekking Poles
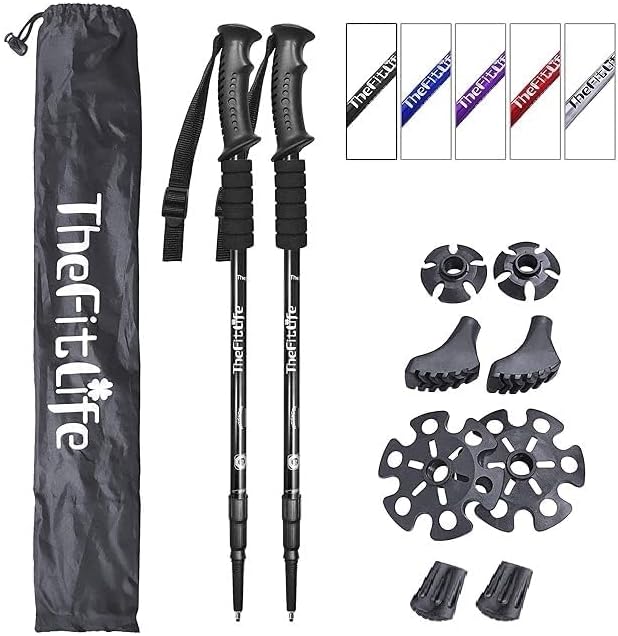
Price Range: $30
Material: Aluminum
Why They’re a Budget Favorite
- Anti-shock feature
- Affordable price
- Multiple terrain attachments
Best For
- Casual hikers
- Beginners
- Light trails
Not ideal for extreme mountain routes.
How to Choose the Best Trekking Poles Under $100 for Your Needs
Choosing the Best Trekking Poles Under $100 isn’t about grabbing the cheapest pair on Amazon. It’s about matching the poles to your specific hiking style, terrain, and goals.
Before clicking “Buy Now,” ask yourself the following important questions — and let’s break down what each one really means.
Are You Hiking Rocky Mountains or Technical Terrain?
If your adventures include:
- Loose scree fields
- Boulder scrambling
- Rocky switchbacks
- Steep alpine descents
You need durability first, weight second.
In rugged environments, aluminum poles are usually the smarter choice. They bend under extreme force instead of snapping, which is crucial when navigating technical terrain.
For hikers tackling mountain routes in places like Yosemite National Park or the Rockies, impact resistance matters more than shaving off a few ounces.
Best choice: Strong aluminum poles with lever locks.
Do You Carry Heavy Backpacks?
If you’re backpacking with 30–50 pounds of gear, trekking poles become even more critical.
Heavy loads shift your center of gravity and increase joint stress. The right poles will:
- Stabilize your steps
- Reduce downhill knee impact
- Improve uphill power
- Minimize ankle strain
For load-bearing hikes, prioritize:
- Durable shafts (aluminum preferred)
- Strong locking mechanisms
- Comfortable grips (cork recommended)
The more weight you carry, the more strength you’ll want in your poles.
Are You Planning Long-Distance Thru-Hikes?
If you’re heading out for weeks or months on trails like the Pacific Crest Trail, every ounce counts.
Over thousands of steps per day, pole weight adds up. That’s why many thru-hikers prefer carbon fiber poles.
Benefits of lighter poles on long hikes:
- Less arm fatigue
- More efficient stride
- Reduced shoulder strain
- Improved long-term endurance
For endurance-focused hikers, carbon fiber poles often win—even under $100.
Do You Prioritize Weight or Durability?
This is the big trade-off.
| If You Value… | Choose… |
|---|---|
| Maximum durability | Aluminum |
| Lightweight efficiency | Carbon Fiber |
| Rugged terrain performance | Aluminum |
| Long-distance mileage | Carbon Fiber |
There’s no universal answer. It depends on your hiking goals.
Proper Trekking Pole Technique
Owning trekking poles is only half the equation. Using them correctly makes all the difference.
Poor technique reduces benefits—and can even cause fatigue.
Let’s break it down.
Uphill Technique
When climbing:
- Shorten your poles slightly (2–5 cm).
- Plant poles firmly ahead of you.
- Push downward as you step upward.
- Engage your arms to help drive momentum.
This transfers some of the climbing effort to your upper body, reducing strain on your legs.
Downhill Technique
Descending is where trekking poles shine.
- Lengthen poles slightly.
- Plant them slightly ahead of your body.
- Keep your arms stable.
- Let poles absorb part of your body weight.
This reduces impact on knees—sometimes dramatically.
If you’ve ever finished a hike with aching knees, proper downhill technique can change everything.
Flat Terrain Technique
On level ground:
- Keep your elbows at 90 degrees.
- Swing poles naturally with opposite arm-to-leg movement.
- Maintain steady rhythm.
This creates efficient pacing and smooth energy use.
Maintenance Tips to Extend Lifespan
Even the Best Trekking Poles Under $100 need basic care to last for years.
A few simple habits go a long way.
Clean After Muddy Hikes
Dirt and grit can damage locking mechanisms.
After muddy conditions:
- Disassemble poles (if possible)
- Wipe down shafts
- Remove debris from joints
Dry Thoroughly Before Storing
Moisture leads to corrosion—especially in aluminum poles.
Always:
- Air dry fully
- Store in a cool, dry space
- Avoid long-term damp storage
Tighten Locks Periodically
Lever locks can loosen over time.
Check them:
- Before long hikes
- After heavy use
- If you notice slipping
A small adjustment prevents frustrating trail issues.
Replace Worn Tips
Carbide tips wear down eventually.
Signs it’s time to replace:
- Reduced grip on rock
- Visible flattening
- Increased slipping
Replacement tips are inexpensive and extend pole life significantly.
Small habits prevent big problems.
Common Mistakes to Avoid
Many hikers waste money by making avoidable buying errors.
Here’s what to watch for.
Setting Incorrect Height
Poles that are too long or too short cause:
- Shoulder fatigue
- Poor posture
- Reduced stability
Always adjust so elbows form a 90-degree angle on flat ground.
Buying Based on Price Alone
Cheapest isn’t always best.
Low-quality locks or weak materials can fail at the worst time—like halfway through a descent.
Focus on value, not just cost.
Ignoring Grip Comfort
You’ll hold these for hours.
Uncomfortable grips cause:
- Blisters
- Hand fatigue
- Sweaty palms
Cork grips are usually worth the small upgrade.
Overlooking Locking Mechanism Quality
Twist locks may slip over time. Lever locks are generally more secure—especially in cold weather.
Lock failure on steep terrain is dangerous.
Using Wrist Straps Incorrectly
Most hikers slide hands down from above.
Correct method:
- Insert hand upward through the strap.
- Grip the handle.
- Let the strap support downward pressure.
This reduces grip fatigue significantly.
Are Trekking Poles Worth It? Expert Perspective
Short answer? Absolutely.
Multiple biomechanical studies show trekking poles reduce joint stress, improve balance, and increase efficiency. Professional guides, search-and-rescue instructors, and experienced backpackers consistently recommend them.
They’re not just for older hikers.
They’re performance tools.
They:
- Protect knees on descents
- Improve endurance on long miles
- Reduce injury risk
- Increase confidence on technical terrain
For serious hikers, trekking poles aren’t optional—they’re strategic gear.
And when you can find the Best Trekking Poles Under $100, there’s really no reason to skip them.
Frequently Asked Questions (FAQs)
Final Verdict: Choosing the Best Trekking Poles Under $100
Finding the Best Trekking Poles Under $100 isn’t about chasing the lowest price—it’s about balancing durability, weight, comfort, and reliability.
If you want lightweight performance, carbon fiber models like Cascade or Foxelli are excellent. If you prefer rugged durability, TrailBuddy or Black Diamond Trail Back are safer bets.
In the end, the right poles depend on your hiking style. But one thing’s certain—once you start using trekking poles, you’ll wonder how you ever hiked without them.
Now grab your gear, hit the trail, and hike smarter—not harder.